How to lay tiles? Tile installation doesn't have to be hard!
Tiling floor and walls is one of the most popular methods for finishing the bathroom or kitchen. Tile is also an increasingly common material used in hallways, living rooms and dining rooms. Hiring a tiler, however, usually means high expenses. It’s not always necessary. Laying tiles, in fact, is a quick and easy procedure, and you can do it yourself. You only need to learn the basic info on how to lay tile.
Tile installation - how to prepare yourself for the task?
Although laying tile is not a very complicated procedure, one should take care of certain preparations beforehand. It is recommended to learn the basic tile installation rules, which can help you calculate the needed material and determine the method for laying tiles.
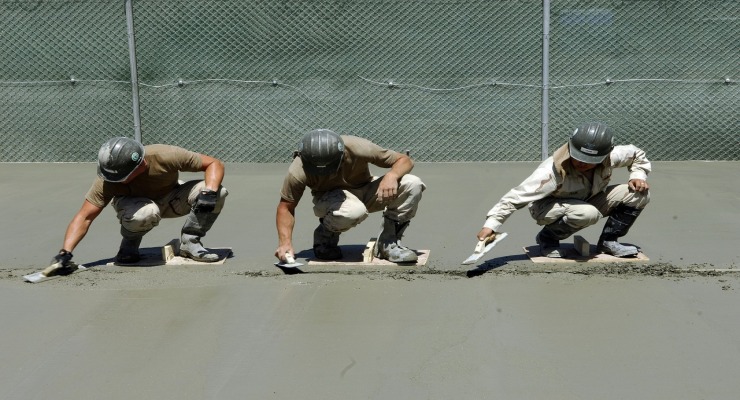
Tile installation should begin with the preparation of the surface designated for this purpose. Both wall and floor tile needs using a consistent and firm substrate.
If the base surface is too weak, it won’t hold the tiles, which are going to fall off after some time. It is, therefore, highly important to remove the outer, loose layer of the floor until you reach the surface which cannot be scratched. Then the it needs to be primed. Thank to this, the floor or the wall will be resistant to moisture which could get under the tile.
It is crucial to choose the right mortar mix, fit to the substrate and the tile. To make laying the tiles easier and more effective - plan your work sensibly. It is recommended to lay whole tiles at the most visible spots,. If you need to cut some tiles, make sure to lay them the less visible areas. If possible - reduce the cutting to minimum.
Tools which will help you with tile installation
Standard tile installation on a wall or floor requires using professional, specialist equipment. When laying tile, you are going to need the following tools:
- tile,
- primer (bond enhancer),
- tile mortar mix,
- tile cutter,
- trowel.
ABC of tiles - perfect tile regardless of the shape or size
Both wall, as well as floor tile is a very important ornamental element in an interior. Thanks to proper tile installation, the room might look elegant and aesthetic, therefore, one should pay special attention to aspects such as the tile shape and pattern. Regardless of those parameters - laying tile might look quite different. Learn the most popular methods for tile installation. Thanks to them, your interior will amaze everyone.
How to lay square tile?
Square tile is one of the most common types available on the market. No wonder then it is chosen by many homeowners.
- Simple tile layout - it is one of the most commonly chosen patterns for square tile installation. The characteristic features are the grouting lines, parallel to the surface, which intersect and form crosses. It is one of the easiest methods for laying tiles, and despite the simplicity, it results in an amazing visual effect.
- Diamond - it’s also one of the most popular designs. Tile installed in a diamond pattern create a sense of dynamics, hence it is typically used in irregularly shaped interiors. It’s a perfect style for strong, pronounced, contrasting colours. It is a great decorative element in Scandinavian style interiors. Diamond pattern tiles form a net of grouting lines set 45 degrees in relation to the walls.
- Offset - this tile layout is used mostly in modern style interiors. It’s a combination of harmony with a hint of disorder. The method involves moving the next row of tile in relation to the previous one.
- Alternating - a tile layout like this is recommended for bold homeowners who are not afraid of pronounced and highly dynamic patterns. Laying tile with this layout involves alternating small and large tiles, which results in an effect of a shift in two directions.
Rectangular tile installation
Rectangular tile is the second most popular type of tiles - it is a common choice among everyone who values classic elements in their interior design. A classic style, in this case, doesn’t mean that wall or floor tile cannot look interesting. Find several most attractive tile layouts for rectangular tile.
- Classic - it’s a style characterized by precision, simplicity and order. This type of tile installation is perfect for classic and elegant interiors. Furthermore, it is quite simple to do.
- Vertical - this pattern is becoming more and more popular. Despite its simplicity, laying tiles like this makes the room look interesting and extraordinary. It fits most interior types, and is quick and easy to design.
- “Brick” - one of the most common patterns used in tile installation. It looks very interesting and is uncomplicated to create. It is typically used in kitchens.
- Herringbone pattern - a typical tile layout used for small wood-like elements. It’s a universal pattern. It can be used both for floor and wall tile.
- Diagonal - a dynamic, yet very organized pattern. It creates an impression of space. It’s a perfect tile layout for tile installation in small interiors.
- Basketweave - a perfect choice if you are looking for a very precise tile installation method. How to lay tiles using this layout? One side of the tile should be exactly twice as long as the other. It’s a highly recommended tile layout for large interiors.
Fish scale tiles - how to lay mosaic tile?
Fish scale tile is a new trend, often chosen for modern interiors. The tiles have original shapes and give you a lot of design possibilities. They are usually blue or green, therefore, they are perfect for bathrooms.
Are you wondering how to lay such tile? One can lay them freely. The effect is unique in any form. Using a grouting in a contrasting colour is an interesting idea - it will bring out the shape of the tiles.
Laying diamond shape tiles
Diamonds on the wall might result in an interesting design, which will catch the eye of anybody who is in the room. They are typically used in modern interiors, where symmetry and bold colours are dominant elements. How to lay tile of this type? It is advised to create geometrical shapes such as cubes, stars or chevron.
Laying tile - a help everybody will appreciate
Are you looking for something which will make laying tile an easier task? Do you think it is impossible? Of course, you might use traditional tools such as a level. However, if you don’t have much experience with laying tiles, it might take you a long time which might result in an uneven surface.
Laying tiles with a modern tile leveling system is a much easier method. Thanks to the special clips and wedges, one can do this quickly and effectively.
A tile leveling system is also a perfect help for specialists. What are its advantages for a professional? Laying tile might become twice as quick as usual. Thanks to this, one might be able to get twice as much work done, and as a result - earn twice as much money.
How to lay tile? A quick step-by-step guide
Preparation before laying tile should involve gathering all necessary tools and checking the packagings with tiles. If everything is all right, you might lay all the elements on the floor.
The next step is the surface preparation and leveling. To do this, use a trowel. Then, prime the substrate. Another important issue is drawing help lines. If you want to lay the tiles currently, plan the layout on the floor or wall. It is generally advised to lay tile starting form the second row.
Preparing tile mortar mix - it’s another crucial point. Follow the instructions on the packaging. Then, put the mortar on the wall. Use a small trowel to transfer the substance onto a floating trowel and spread it upwards with the toothed side, so that there are visible lines in the mortar.
Only now you can start the proper tile laying. Stick the first tile. If you are using a tile leveling system - separate the next tiles with leveling clips. Then, wedges need to be inserted into the clips - any irregularities can be easily corrected with a rubber mallet.
Grouting. After the mortar dries, one needs to get rid of the tile leveling system and put the grout, which protects the surface. Grout prevents moisture and dirt from getting under the tile, therefore it is a very important stage of laying tile.
How to lay tile without grout?
Many homeowners dream of a perfectly even floor without any unaesthetic gaps. A flawless, smooth floor makes the room look elegant and minimalistic, and creates an impression of a larger space. But is it possible to lay tiles so that the gaps between them are invisible? Apparently, nothing is impossible nowadays. Laying tiles this way, however, might pose a certain risk. Check it before you decide on a particular solution.
What is the purpose of grout?
Grout is a type of a flexible joint placed between the tiles. Its function is both protective and decorative. The main, most important purpose of grout is concealing the differences between the sizes of the tiles. Without it, gaps between the elements become very apparent, which disrupts the whole effect.
Apart from the ornamental function, the product also protects the tile from various types of damage and harmful external factors. It secures the floor and wall from moisture, prevents the dust and dirt from accumulating in the creases, and eliminates fungi and mould. Filling the gaps thoroughly with grouting also increases the grip of the tile to the spot it has been glued.
What’s more, grout is useful not only for laying tiles, but also when a single damaged tile needs replacement. Thanks to the filler, one can do that without damaging other element surrounding the tile.
Is it possible to lay tile with invisible grout?
How to lay tile without grout - it is one of the most common questions from aesthetes and lovers of minimalist interiors. Is it possible at all? The answer is: yes! Keep in mind, however, that to do it, one has to use special rectified tile. Elements of this type have been cut to a perfectly even shape right after burning.
Rectified tile is perfect both for bathrooms and kitchens. This type of flooring looks best in larger rooms, where the size of the room highlights the smoothness of the surface. The tiles fit to minimalist interiors with a limited amount of furniture and decorations.
What is the risk of laying floor tile without grout?
Although laying tile without grout is possible, one should consider whether it is a good idea. The lack of grout makes the flooring or wall surface more vulnerable and prone to damage. Without any joint, the elements lose their grip, which makes laying tile more complicated. In addition, there is also a risk that a poorly embedded element cracks, crumbles or even completely falls off the surface. Floor tiles without grout are also more prone to letting moisture, bacteria and mold underneath.
The fact that it is impossible to disasemble this type of tile is one of its biggest disadvantages. When one of the elements gets damaged, it cannot be replaced without breaking the rest of the tiles located next to it.
As stressed by specialists, minimizing the grout to a safe thickness and choosing its aesthetics is a much better solution. This effect is easy to achieve with the aforementioned modern tile leveling system.
You gathered a huge portion of knowledge - now you are ready to lay tile by yourself. Just choose the right type of tile and collect all necessary tools - and you can start working.
FAQ
Laying floor tile - how to begin?
When tiling floor, one should start from preparing all the necessary materials and tools that could help you with the task. If you don't have any experience - try laying the tiles "dry" first. Measure the room carefully and check whether your project matches the reality. Start the proper tile laying from the middle of the room - so you can make any adjustments in the less visible sides of the interior.